
FREE Bone-Shaped Dog Toy - Easy Crochet Pattern
 UPDATE 2/7/23: Formatting fixes.
NB: Crocheted dog toys are only really good for dogs that ARE NOT heavy chewers, toy-eaters or otherwise destroyers of their toys. Crochet dog toys are only good for those dogs that like to carry, snuggle or occasionally give their toys a good shake. If a crochet dog toy becomes damaged, like any other damaged toy, you should take it away from your dog promptly. Know your dog and if this toy is appropriate for him or her. Dogs are dumb - they will eat things and get intestinal blockages and plunge you into debt with vet bills, but for some reason we still like them. :)
 Anywho...
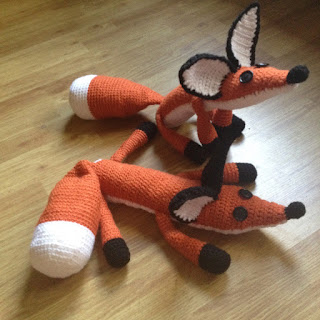
This is a great use of scrap yarn because dogs don't care if you give them a toy that is totally hideous. I've made two of these, both from scrap yarn, but I forgot to take pictures of the first one and I no longer have it.
It is also important to note that as you are working on this it will look a bit vulgar and, um, phallic.
Materials
- worsted, aran, bulky or really whatever yarn you want (I recommend acrylic on account of it's washable) in whatever color or colors you want
- stuffing material (I recommend polyester on account of it's washable)
- a crochet hook of whatever size you want to use for whatever yarn you have chosen
- stitch marker (optional)
- Doesn't matter! A larger hook/thicker yarn will determine size...you really have a lot of freedom with this pattern, take advantage of it. I used size F and worsted weight. I also used tight sc, but you can easily make this in sl for a more firm, less floppy bone. Stuff it more tightly or loosely as well to further customize it for your dog!
- Starting at the top of one of the "knobs" at one end of the bone, you'll be working in continuous rnds and may want to use a stitch marker to mark the beginning of your rnds - ch 4, join to form loop;
- Rnd 1: work 7 sc into loop;
- Rnd 2: 2 sc in each st around (14);
- Rnd 3: inc in every 2nd st (21);
- Rnd 4: inc in every 3rd st (28);
- Rnd 5: inc in every 4th st (35);
- Rnd 6-15: work even - you can actually do more or less of these work even rows depending upon the size you want your knobs to be. If you choose to do a different number make sure to note it if you want all four knobs the same (feel free to make them different sizes to create a custom crazy bone!);
- Rnd 16: dec in every 3rd st (26 sts) - if making your bone all in one color then you want to break off your yarn here to start the second knob. If you're making your bone from scrap yarn you can feel free to just leave it attached and sit it aside then make the second knob in a new color;

- use sl to seam the knobs together, do this with the outside of both knobs touching and use 8 sts;
- sc completely around the outside of the newly joined knobs (36 sts);
- dec every 9th st (32);
- sc around working dec that line up with where you joined the knobs (30);
- work even until bone is desired length, use a stitch marker if you want or you can just eyeball when you get to the end;
- inc in 15th st and last st (32);
- inc in every 8th st (36);
- sc in next 18 sts, ch 8 and join to 1st st to create bottom of knob (26)
- inc in every 3rd st (35);
- work even for 10 rnds (or however many you need to);
- dec every 4th st (28);
- dec every 3rd st (21);
- dec every 2nd st (14);
- dec every st, stff and close hole with your preferred hole closing method;


Comments
Post a Comment